← Back to Help & Guides · Kiro Setup
Step 1 of 2
Activate Kiro for your organisation
One AWS administrator completes this once. Your team can then sign in to CloudOpsGPT.
-
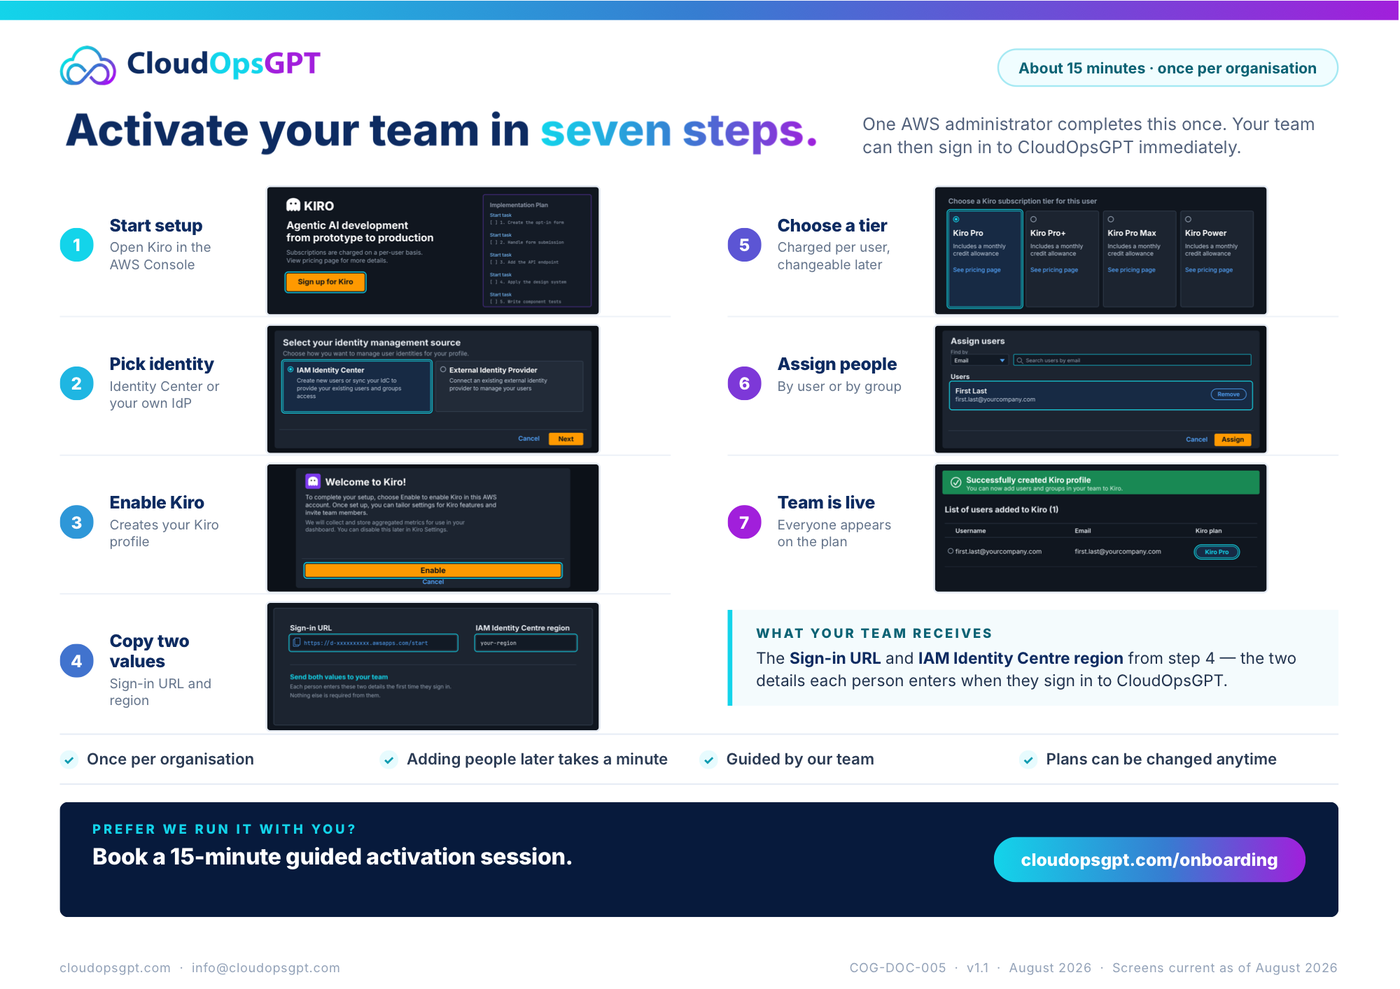
Start setup
Open Kiro in the AWS Console.
-
Pick identity
Choose IAM Identity Center or your own IdP.
-
Enable Kiro
Creates your Kiro profile.
-
Copy two values
Copy the Sign-in URL and IAM Identity Centre region. Keep them ready for Step 2.
-
Choose a tier
Charged per user; changeable later.
-
Assign people
Assign by user or by group.
-
Team is live
Everyone appears on the plan.
More reference
What your team receives: The Sign-in URL and IAM Identity Centre region from step 4 — the two details each person enters when they sign in to CloudOpsGPT. This guide explains which values to copy from AWS; it does not contain your organisation’s real values.